Understanding how your website performs is crucial for making informed business decisions. Google Analytics remains the gold standard for tracking visitor behavior, measuring conversions, and uncovering growth opportunities. Whether you’re launching a new site or finally getting serious about data, setting up Google Analytics correctly from the start saves countless headaches down the road.
This guide walks you through every essential step of the setup process, from creating your account to verifying that data flows properly into your reports.
Why Google Analytics Matters for Your Website
Before diving into the technical setup, it’s worth understanding what you’re about to unlock. Google Analytics provides detailed insights into who visits your site, how they found you, which pages capture their attention, and where they drop off. This information directly influences content strategy, marketing spend, and user experience improvements.
The platform tracks metrics like bounce rate, session duration, traffic sources, and conversion paths. For businesses, this translates to knowing which marketing channels deliver actual results rather than just impressions or clicks. For content creators, it reveals which topics resonate and which fall flat.
Creating Your Google Analytics Account
The first step requires a Google account. If you already use Gmail, Google Ads, or any Google service, you’re set. Otherwise, creating one takes just a few minutes at accounts.google.com.
Once logged in, navigate to the Google Analytics homepage. Click the “Start measuring” button, which launches the account creation workflow.
Account Setup Details
You’ll need to provide an account name, which typically matches your company or organization name. This becomes important if you manage multiple properties under one umbrella. For instance, a marketing agency might use their agency name as the account, then create separate properties for each client.
The account settings also include data sharing options. Google offers to share your analytics data with other Google products, benchmarking services, and technical support. Review these carefully based on your privacy preferences and business requirements.
Configuring Your Property Settings
After establishing the account, you’ll create a property. Think of properties as individual websites or apps you want to track. A single account can house multiple properties, which proves useful for businesses with several web assets.
Choosing Between GA4 and Universal Analytics
Google Analytics 4 (GA4) represents the current standard. Universal Analytics, the previous version, stopped collecting data in July 2023. If you’re setting up analytics now, GA4 is your only viable option. It offers event-based tracking, cross-platform measurement, and machine learning-powered insights that Universal Analytics couldn’t match.
Property Configuration Essentials
When setting up your property, you’ll specify:
Property name: Usually your website name or brand
Reporting time zone: Affects how daily reports align with your business hours
Currency: Determines how monetary values display in reports
These settings influence how data appears but don’t affect the actual collection process. You can modify them later if needed, though changing time zones can create reporting gaps.
Setting Up Data Streams
Data streams represent the actual connection between your website and Google Analytics. For websites, you’ll create a Web data stream.
Enter your website URL and provide a stream name. The stream name often mirrors the property name but could be more specific if you’re tracking multiple domains or subdomains under one property.
After creating the stream, Google generates a Measurement ID. This unique identifier looks something like “G-XXXXXXXXXX” and serves as the bridge between your site and your analytics account.
Installing the Google Analytics Tracking Code
This step makes or breaks your entire setup. Without proper implementation, no data reaches your reports. You have several installation methods depending on your technical comfort level and website platform.
Using Google Tag Manager
Google Tag Manager provides the most flexible and manageable approach, especially for websites that use multiple tracking tools. It creates a container on your site where you can add, update, and manage tracking codes without touching your website’s core code.
After creating a Tag Manager account and container, you’ll install two code snippets on your website: one in the <head> section and another immediately after the opening <body> tag. These snippets load the container and enable all tags you configure within it.
Inside Tag Manager, create a new tag with the Google Analytics: GA4 Configuration tag type. Enter your Measurement ID and set the trigger to “All Pages.” This ensures the tracking code fires on every page of your website.
Direct Installation on Your Website
If you prefer skipping Tag Manager, you can install the Global Site Tag (gtag.js) directly. Google provides this code snippet in your GA4 property settings under Admin > Data Streams > Web > View tag instructions.
Copy the entire code block and paste it into the <head> section of every page you want to track. For most websites, this means adding it to your header template file.
Platform-Specific Installation
WordPress: Several plugins simplify GA4 implementation. Site Kit by Google offers official integration and handles the technical details. Insert Headers and Footers provides a code injection point if you prefer manual control. MonsterInsights and ExactMetrics offer premium features alongside basic tracking.
Shopify: Navigate to Settings > Analytics in your Shopify admin panel. Paste your Measurement ID in the Google Analytics section. Shopify automatically implements the tracking code across your store.
Wix: Open Settings > Marketing & SEO > Marketing Integrations. Select Google Analytics, then click Connect. Enter your Measurement ID when prompted.
Squarespace: Go to Settings > Analytics > Google Analytics. Paste your Measurement ID and save. Squarespace handles the technical implementation automatically.
Verifying Your Installation
Installation means nothing if data isn’t flowing correctly. Google provides several verification methods to confirm everything works.
Real-Time Reports
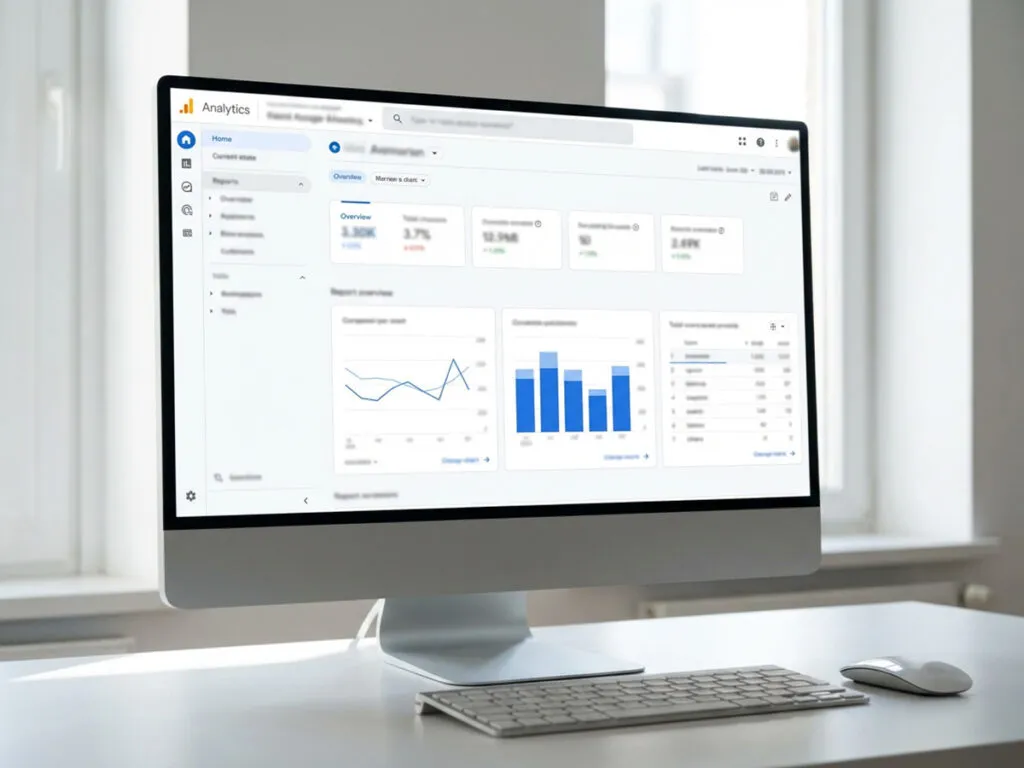
The quickest verification uses the Realtime report within Google Analytics. Navigate to Reports > Realtime and open your website in another browser tab or device. You should see activity appear within seconds, showing at least one active user (you) and the page you’re viewing.
If nothing appears after a few minutes, something’s wrong with your implementation. Check that you’ve installed the code on the correct pages and used the right Measurement ID.
Google Tag Assistant
For more detailed verification, install the Google Tag Assistant Chrome extension. This tool detects Google tags on any page you visit and flags implementation issues.
Visit your website with Tag Assistant enabled. It should detect your GA4 tag and confirm it’s firing correctly. The extension highlights problems like duplicate tags, missing parameters, or configuration errors.
DebugView
GA4’s DebugView provides granular insight into data collection. Enable debug mode by installing the Google Analytics Debugger extension or by adding parameters to your tracking configuration. DebugView then displays every event as it fires, including automatically collected events and any custom events you’ve configured.
This proves invaluable for troubleshooting specific tracking issues or validating that custom implementations work as intended.
Configuring Enhanced Measurement
GA4 automatically tracks several interactions through enhanced measurement. This feature captures events without requiring additional code, including:
- Scrolls: When users reach 90% of a page
- Outbound clicks: Links to external domains
- Site search: If your site has a search function
- Video engagement: For embedded YouTube videos
- File downloads: PDF, document, and archive downloads
Access these settings under Admin > Data Streams > Enhanced measurement. Toggle individual events on or off based on what matters for your business. Most sites benefit from keeping all enhanced measurement events active.
Setting Up Conversion Tracking
Traffic metrics tell only part of the story. Conversions reveal whether your site achieves its goals. In GA4, you mark specific events as conversions to track desired actions.
Common conversion events include form submissions, purchases, newsletter signups, and button clicks. GA4 automatically marks the “purchase” event as a conversion for e-commerce sites, but you’ll need to configure others manually.
Navigate to Admin > Events to view all events your property collects. Next to each event, you’ll find a toggle to mark it as a conversion. Once marked, the event appears in conversion reports and can be used as a goal in Google Ads campaigns.
For custom conversions not automatically tracked, you’ll need to implement event tracking through Google Tag Manager or by modifying your tracking code.
Linking Google Analytics with Other Platforms
Google Analytics becomes significantly more powerful when connected to other marketing tools.
Google Ads Integration
Linking Google Ads allows you to see the complete customer journey, from ad click to on-site behavior to conversion. This data informs bid strategies, ad copy testing, and audience targeting.
In Google Analytics, go to Admin > Product links > Google Ads links. Select your Google Ads account and confirm the link. Data sharing flows in both directions, enabling features like remarketing audiences and conversion import.
Google Search Console Connection
Google Search Console reveals which search queries drive organic traffic to your site. Linking it with Analytics combines search performance data with behavior metrics.
Navigate to Admin > Product links > Search Console links. Choose your verified Search Console property and complete the linking process. After 24-48 hours, Search Console reports appear within your Analytics interface.
Understanding Key Reports and Metrics
With tracking in place, familiarize yourself with the reports that drive decisions.
Acquisition Reports
These show how visitors find your website. You’ll see breakdowns by source (Google, Facebook, direct), medium (organic, paid, referral), and campaign. Understanding acquisition helps you allocate marketing budget effectively.
Engagement Reports
Engagement metrics reveal what happens after visitors arrive. Page views, average engagement time, and user paths through your site highlight content performance and navigation issues.
Monetization Reports
For e-commerce sites, monetization reports track revenue, transactions, and product performance. Even non-e-commerce sites can assign values to conversions for better ROI measurement.
User Demographics and Interests
When enabled, Google collects demographic data and interest categories based on users’ broader browsing behavior. This helps refine targeting and understand your actual audience versus your assumed audience.
Privacy and Compliance Considerations
Analytics implementation carries legal responsibilities. GDPR in Europe and CCPA in California impose requirements around user consent and data handling.
Most websites need a cookie consent banner that allows visitors to opt out of analytics tracking. Services like Cookiebot, OneTrust, and CookieYes integrate with Google Analytics to respect user preferences.
Review Google’s data processing terms and ensure your privacy policy discloses analytics usage. Consider implementing IP anonymization in regions where data protection regulations demand it.
Common Setup Mistakes to Avoid
Even experienced marketers make these errors:
Multiple tracking codes: Installing GA4 alongside old Universal Analytics code creates duplicate data. Remove outdated implementations.
Wrong Measurement ID: Double-check that your tracking code references the correct property. A typo sends data into the void.
Tracking yourself: Your own site visits skew data, especially for low-traffic sites. Set up filters or use browser extensions to exclude internal traffic.
Ignoring cross-domain tracking: If your site spans multiple domains (like a separate checkout domain), configure cross-domain tracking or lose attribution data.
Forgetting mobile apps: If you have both a website and mobile app, create separate data streams and consider implementing cross-platform tracking for complete user journey visibility.
Moving Forward with Your Analytics Setup
With Google Analytics properly configured, you’ve laid the foundation for data-driven growth. The platform captures visitor behavior automatically, but its real value emerges when you actively analyze trends, test hypotheses, and make changes based on what the data reveals.
Regularly review your top-performing content, identify drop-off points in conversion funnels, and monitor traffic source quality. Set up custom reports for metrics that matter most to your specific goals. Schedule weekly or monthly analytics reviews to spot patterns and opportunities.
The setup process might feel technical, but the insights waiting on the other side justify every minute spent getting it right. Your website now speaks in data, and with Google Analytics listening, you’re equipped to make informed decisions that move your business forward.